

1. Excavation
To save time later on in the construction process, having a level excavation +-2” is ideal for the system. This will reduce time spent onsite adjusting attachment of Fastfoot later on.
2. Stringlines and batter boards
Setup batter boards and stringlines around perimeter with string located exactly 8” outside ICF and about 4” above top of footing. Loop end of string so it can be quickly taken down when not needed.

3. Spray paint Layouts
Using stringline as guide, spray paint centerline of footing, and with another colour, spray paint outside of ICF wall.

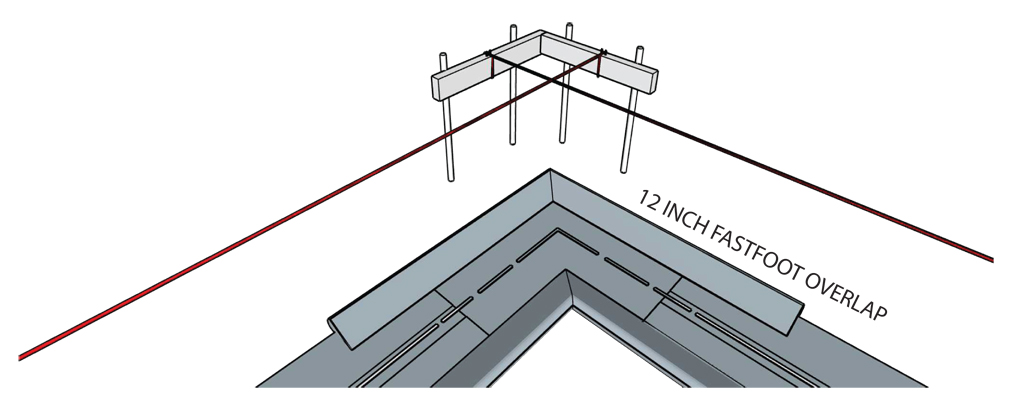
4. Layout Fastfoot
Place Fastfoot corners and t-junctions in posisition. Then unroll Fastfoot with 12” overlap with corners/tee’s.
Either tape the overlaps, or place a negative/positive overlap. Ensuring you pour with these overlaps to prevent concrete leakage.
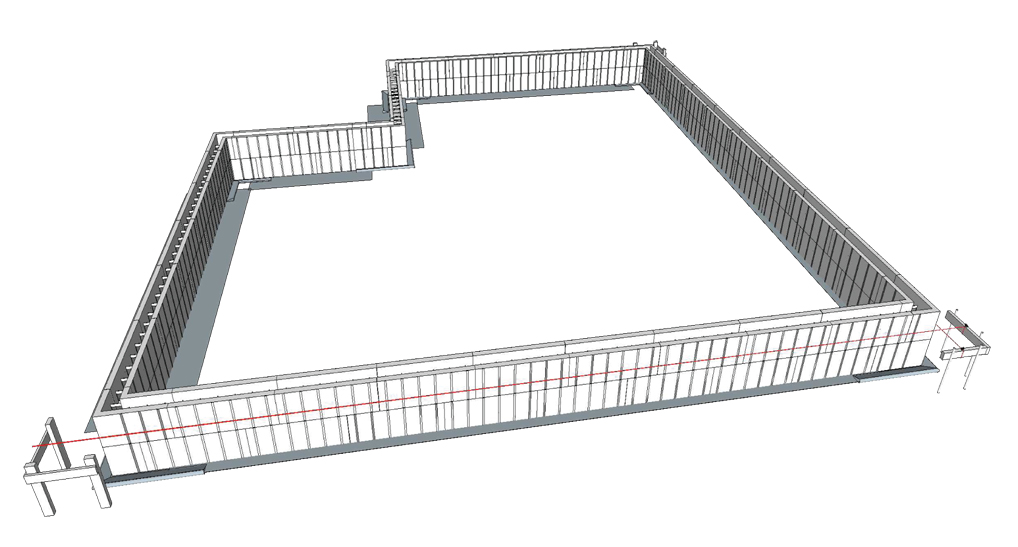
5. Build ICF Wall
Starting at corners, build your ICF wall on top of the Fastfoot as you normally would on top of a footing.
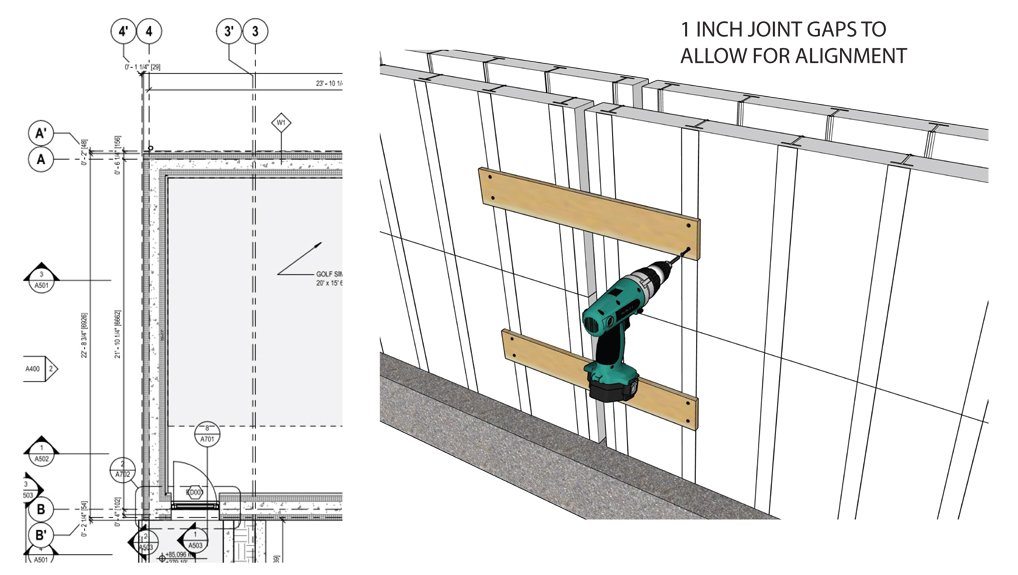
When approaching a common stack joint (marriage line) ensure at least a 1” gap, which will be fine tuned later.
Install rebar and install second course of ICF. Ensure corner and straight rebar is NOT tied at this point.
Tying rebar together will make it difficult to adjust wall lengths later on.
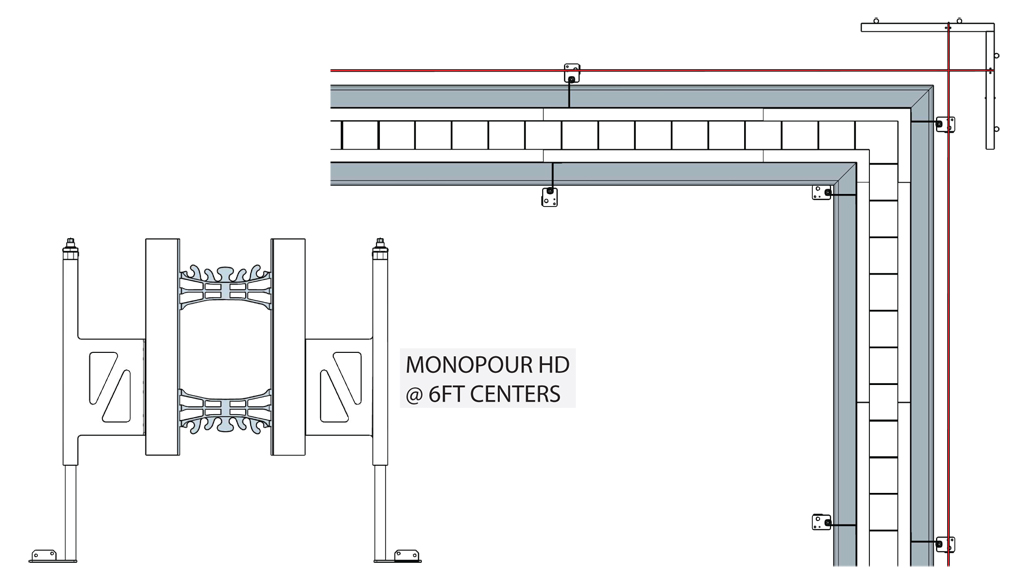
6. Install MPHD
Beginning at corner, install a pair of MPHD to the inside and outside face of the corner, using three screws per MPHD. Then place a pair 6’ on center around the perimeter of the foundation. Move Fastfoot to suit.
7. Rough adjustment
Using a laser and 2’ level, begin drilling the ICF wall to required height. Ensure corners are plumb and kept in the correct position against your spray-painted line.
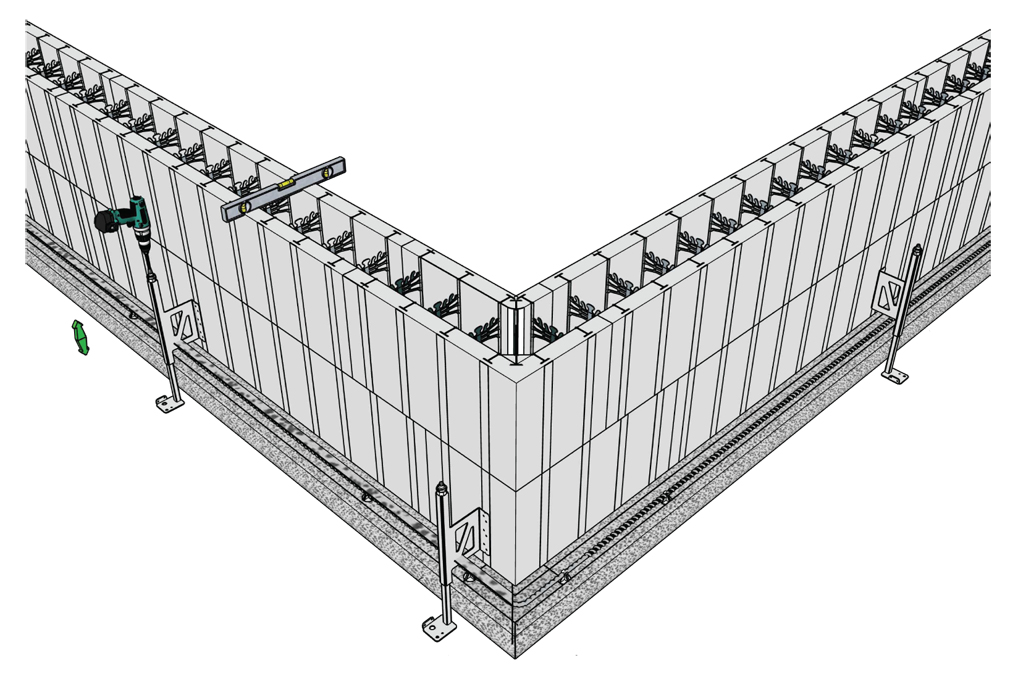
8. Lock in wall dimensions
Using a tape, your stringlines, and the 3-4-5 method, confirm wall lengths and corner positions. Strap vertical stack joints with 1x4 ensuring both sides match with a laser.
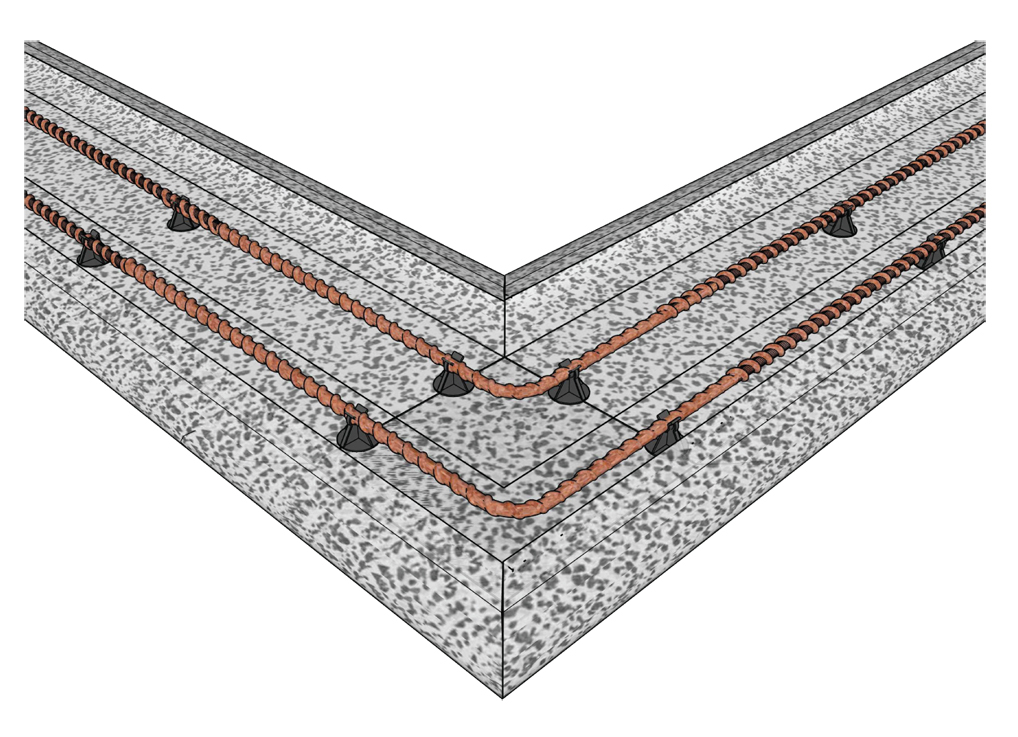
9. Install footing rebar
Ensure the Fastfoot centerline is in the middle of the ICF wall. Install footing rebar with chairs as per local code. Weight of the rebar will ensure Fastfoot doesn’t shift and the centerline stays in position throughout the build.
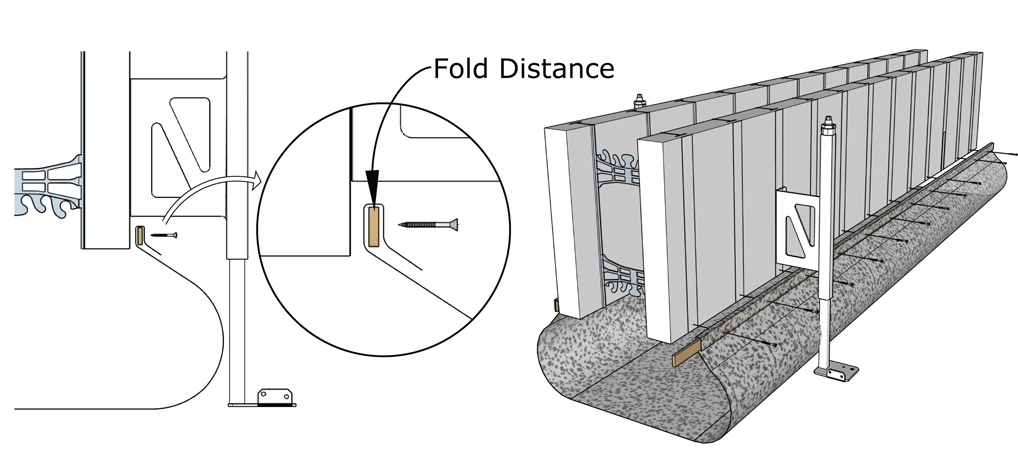
10. Attach Fastfoot
Confirm in multiple locations the depth of your current footing. Using this information use the calculator on to establish your “fold distance”.
Using a plywood wood batten and #8 1-1/2” wood deck screws, fold Fastfoot over the batten and begin at corners screwing into each web of the ICF. Maintaining 12” overlaps on corner material.
11. Continue building wall
Continue building the ICF wall until a height of roughly 6’ is reached. If necessary, make slight adjustments to wall height with MPHD.
12. Install Zont Bracing
Beginning 12” from an inside corner install a pair of Zont brackets, one at the top of the ICF wall and one at the bottom of the second course of ICF. Place walers and strongbacks in position.
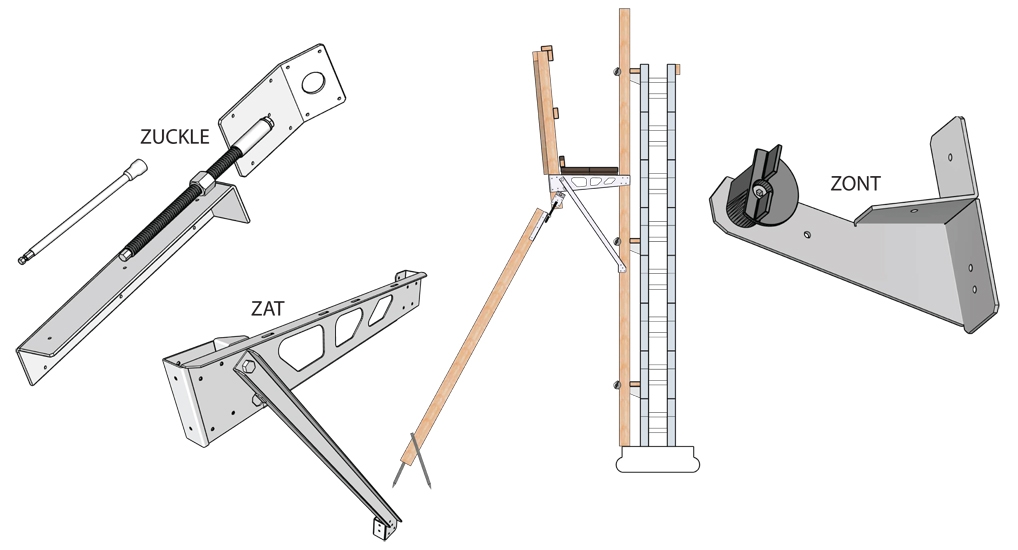
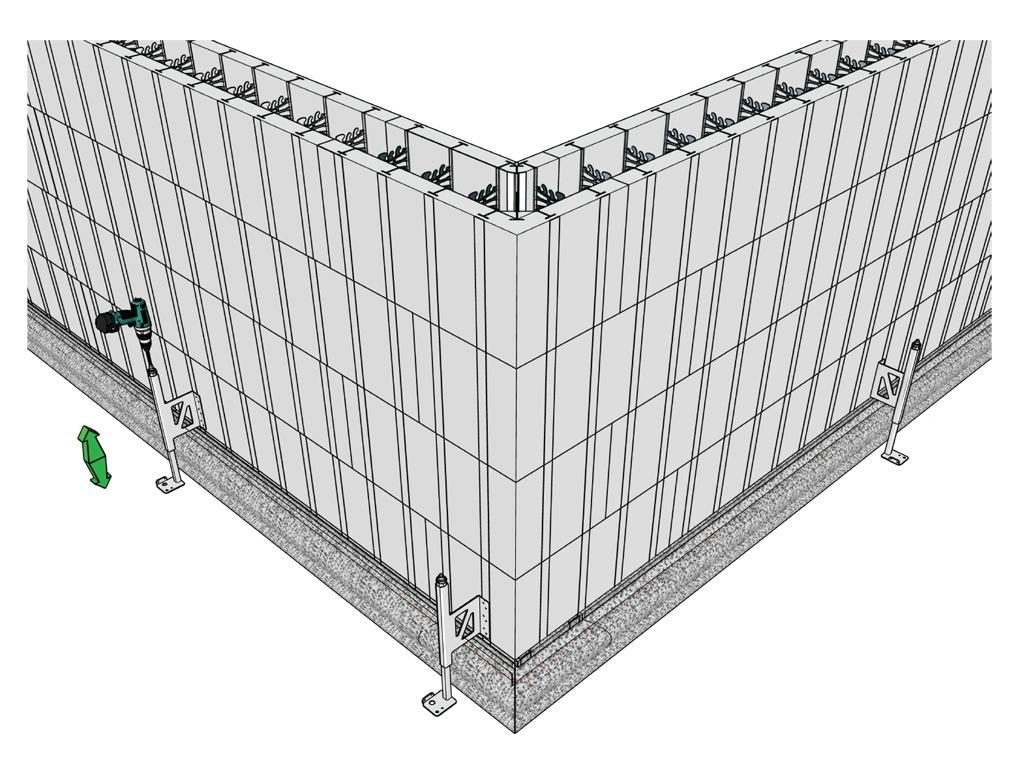
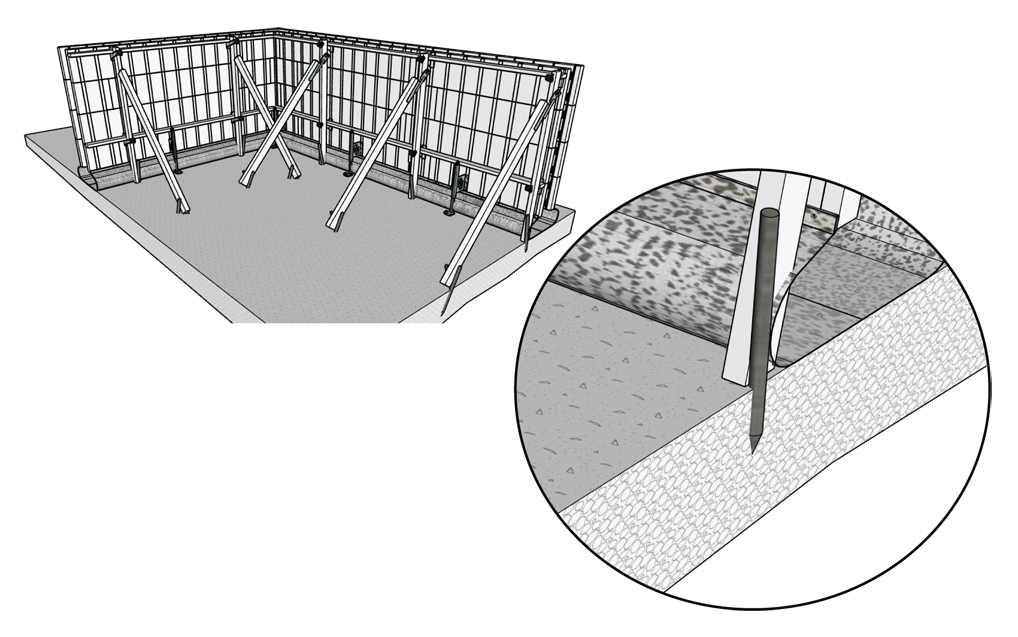
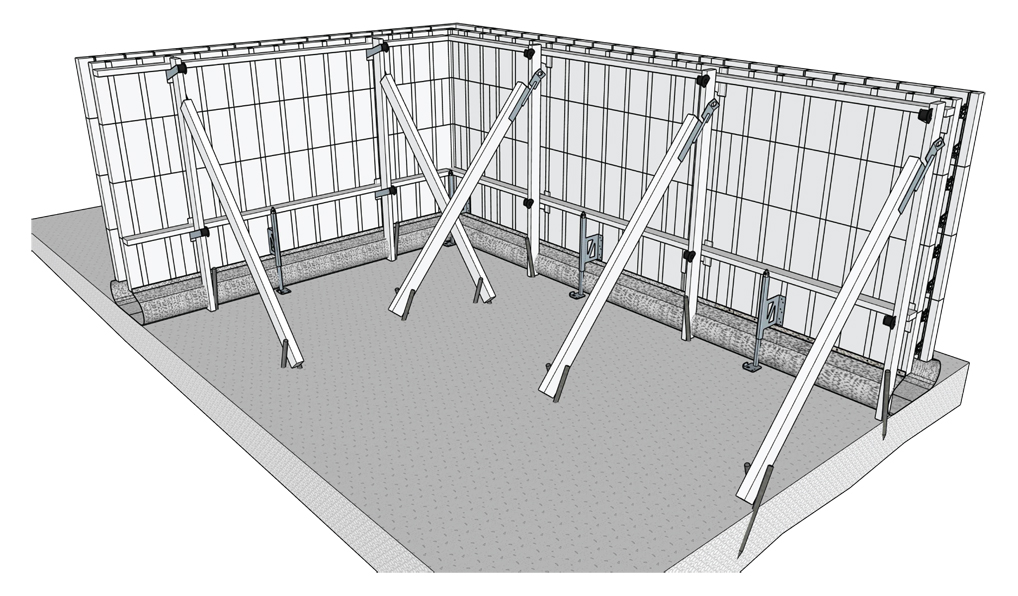
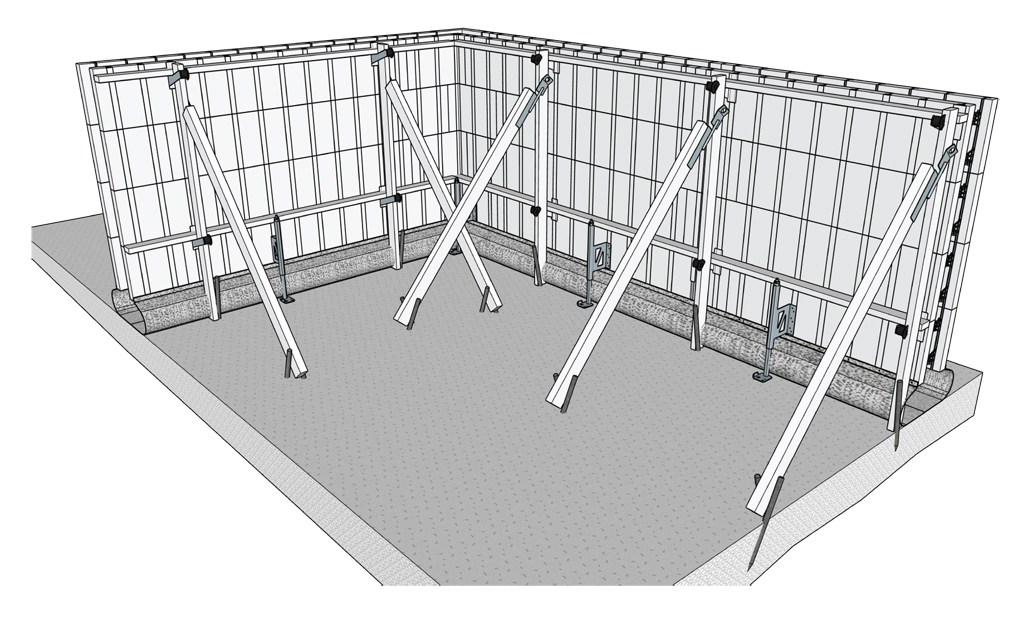
13. Stake wall in position
Drive a stake adjacent to each strong back, and move wall back and forth until it is exactly 8” off of stringline, then screw to strongback. Install Zuckle to one end of a suitably sized 2x4” and attach to where the top of wall will be in the future. Ensure Zuckle is at mid range on adjustment and that the lumber is facing upwards to ensure maximum travel. Double stake lumber end of kicker into ground. With an electric drill ensure wall is plumb.
14. Final height adjustment
Check top of wall heights with a lazer. IF adjustment of wall is necessary, back off Zont Camlocks to all wall height adjustment. If you do not release the Zonts from the strongback you are asking your drill and the MPHD to lift your stakes and ICF wall out of the ground.
15. Complete building ICF wall
Continue constructing your ICF wall as per manufacturer instruction. If needed install Zat walkway bracket roughly 3’ from top of wall for safe concrete placement. Once final wall height is achieved, installfinal Zont brackets at top of wall using a 6” extension. Installfinal horizontal walers. Set up stringlines at top of wall and adjust Zuckles to ensure the wall is straight.
16. Concrete Pour
Order Concrete with a 5-6” slump, concrete should freely floow into footing. Pour the footing + 6” of the first block. Allow sfficient time for the footing concrete to “go off”. Depending on the size of the project, an accelerator may be required.
Note that winter pours will greatly increase cure time, as the cold soil will slow the chemical reaction.
Continue with lifts of concrete as you would with a conventional ICF pour.