ZONT™ BRACING

Installation on Pre-Poured Footings & Slabs
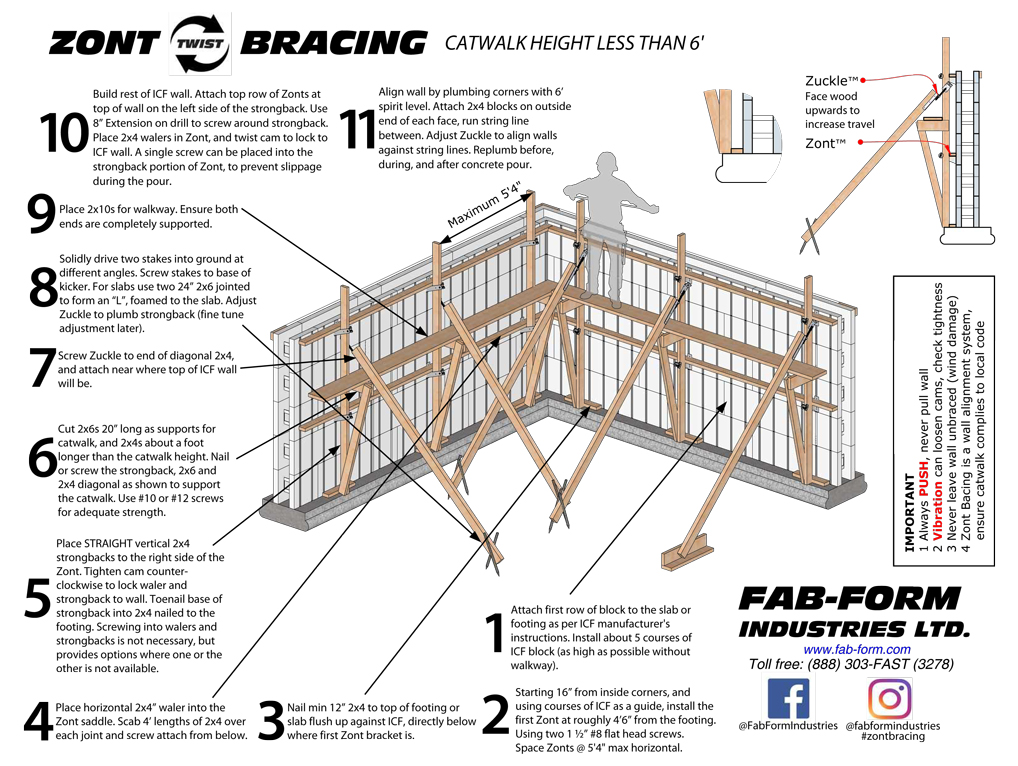
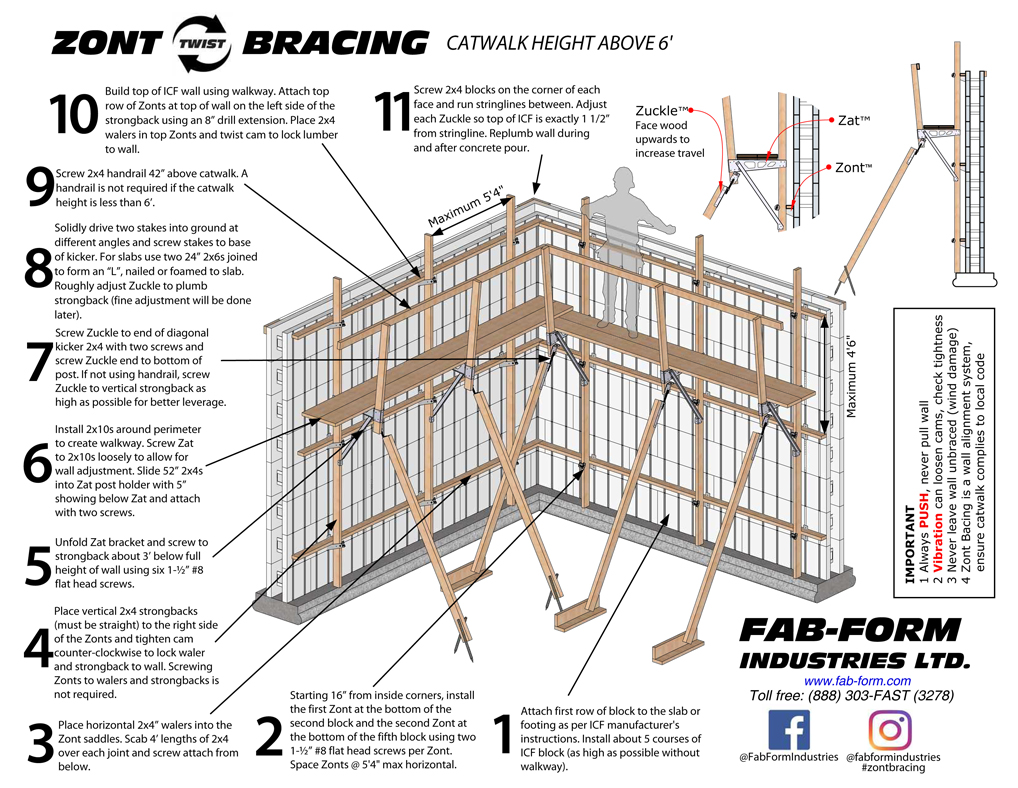
For Monopour bracing, click here.

Zont Twist Main Image
  1. Attach first row of block to slab or footing with foam glue, metal channel or 2x4s as per ICF manufacturer's instructions.
  2. Lay three or four courses of block, then screw first layer of Zonts™ along top edge 6' on center using 1-1/2" #8 flat head screws.
  3. Place 2x4 walers in Zont™ saddles. Scab 4' 2x4 over joint for continuity. Scab short length of 1x4 over corner joint if required.
  4. Cut spacer 3-5/8" in width for positioning between the ICF wall and bottom of each strongback.
  5. Place 2x4 vertical strongbacks on right side of Zont™, nailing base of plumbed strongback to footing (use spacer at base to position). Tighten cam counter-clockwise to lock waler and strongback to wall.
  6. Choose a kicker length so that when at 45º the top end is about 3/4 of the way up the wall. Screw attach Zuckle™ to top end of kicker and double screw to strongback. The higher the attachment point, the easier it is  to push wall; too high and kicker gets in way of catwalk.
  7. Solidly drive stakes in the ground at base of kicker, screw stakes to kicker. If necessary use two stakes at different angles to increase holding power.
  8. Screw plywood gussets to each strongback at height to allow easy concrete placement and finishing. If railing is required, use short lengths of 2x6 to span between strongback and second vertical 2x4 to support 2x10 catwalk. Ensure catwalk and railing conforms to local code.
  9. Build top of wall. Spot glue top blocks to prevent separation between layers during pour. Use 8" extension on impact drill to attach top row of Zonts™ beside each strongback. Place waler in position, then twist cam counter-clockwise to lock 2x4s against wall.
  10. Align wall by first plumbing corners with 6' spirit level. Attach short 1x4 blocks on top outside end of each face, run stringline between. Adjust Zuckles™ to align top edge of wall 3/4" from stringline. Re-check alignment during and after pour.

IMPORTANT: Never leave a wall unbraced - a gust of wind will cause extensive damage.

IMPORTANT: Alway PUSH a wall to align, never pull.

IMPORTANT: Concrete vibration can loosen cams, check tightness during pour.

Click on image below for installation guide in PDF format:

Zont Twist Installation Guide

For a template to cut plywood gussets, click here.

Click on image below for the Zont™ Bracing Estimator.

Zont Estimator

Tools

Lumber

Fasteners

Top of page